Whirlpool WED4910XQ User Manual

Browse online or download User Manual for Electric laundry dryers Whirlpool WED4910XQ. Dimension Guide - Whirlpool Outlet

  • Download
  • Add to my manuals
  • Print
  • Page
    / 2
  • Table of contents
  • BOOKMARKS
  • Rated. / 5. Based on customer reviews
Page view 0
Electric Dryer
PRODUCT MODEL NUMBERS
Installation spacing for recessed area or closet installation
The dimensions shown following are for the minimum spacing allowed.
Additional spacing should be considered for ease of installation and servicing.
Additional clearances might be required for wall, door, and oor moldings.
Additional spacing of 1" (25 mm) on all sides of the dryer
is recommended to reduce noise transfer.
For closet installation, with a door, minimum ventilation openings in the top and
bottom of the door are required. Louvered doors with equivalent ventilation
opening are acceptable.
Companion appliance spacing should also be considered.
W10514172A
08/2013
WED4800X, WED4850X,
WED4900X, WED4910X
Installation clearances:
The location must be large enough to allow the dryer door to
open fully.
Dryer Dimensions
*Most installations require a minimum 5½" (140 mm) clearance
behind the dryer for the exhaust vent with elbow. See “Venting
Requirements.”
Minimum Required Spacing
A
B
C
18"*
(457 mm)
1"
(25 mm)
29"
(737 mm)
1"
(25 mm)
1"*
(25 mm)
14" max.*
(356 mm)
27¾"
(705 mm)
48 in.
(310 cm )
2
*
2
3"*
(76 mm)
3"*
(76 mm)
24 in.
(155 cm )
2
*
2
A. Recessed area
B. Side view - closet or conned area
C. Closet door with vents
*Additional spacing recommended
Minimum spacing for recessed area or closet installation
Page view 0
1 2

Summary of Contents

Page 1 - Electric Dryer

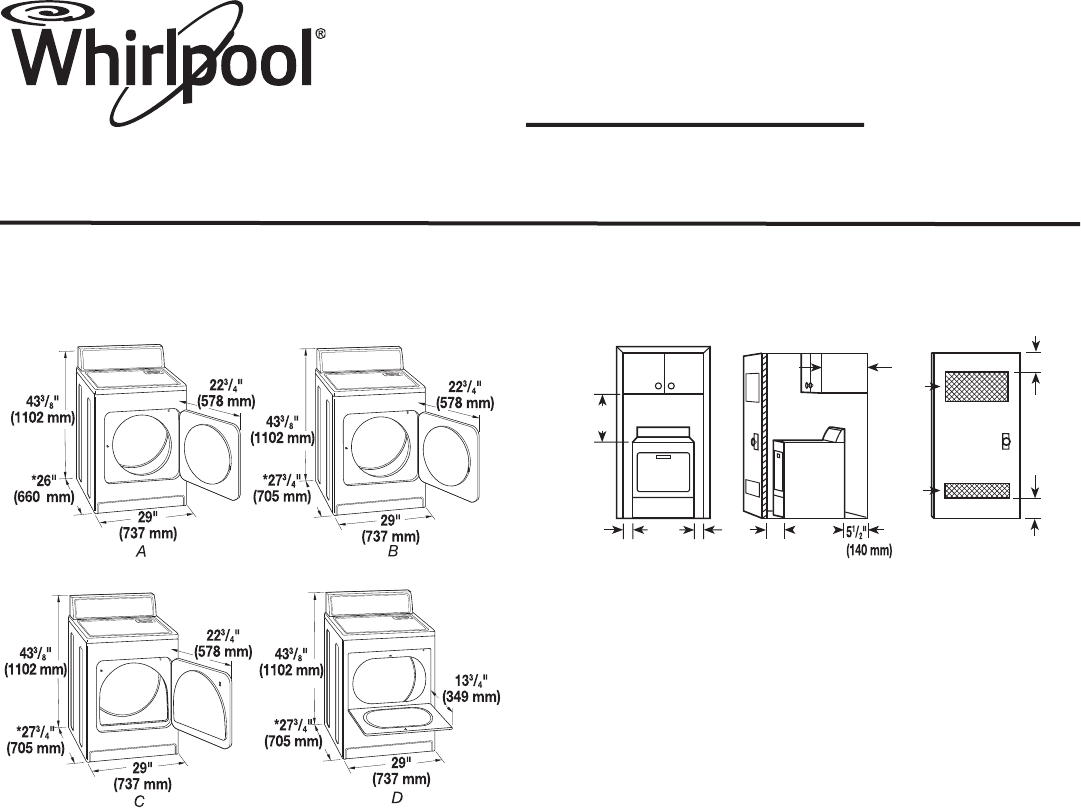
Electric DryerPRODUCT MODEL NUMBERSInstallation spacing for recessed area or closet installationThe dimensions shown following are for the minimum spa

Page 2 - VENTING REQUIREMENTS

Because Whirlpool Corporation policy includes a continuous commitment to improve Dimensions are for planning purposes only. For complete details, see

Comments to this Manuals

No comments