Whirlpool WRF997SDDM Use and Care Manual Page 10
- Page / 108
- Table of contents
- TROUBLESHOOTING
- BOOKMARKS
- REFRIGERATOR 1
- USER INSTRUCTIONS 1
- REFRIGERATOR SAFETY 2
- Proper Disposal of 3
- Your Old Refrigerator 3
- What’s New Behind the Doors? 3
- INSTALLATION INSTRUCTIONS 4
- Door Removal and Replacement 5
- Electrical Shock Hazard 6
- Remove and Replace Freezer 7
- Drawer Front 7
- Electrical Requirements 8
- Water Supply Requirements 8
- Connect the Water Supply 9
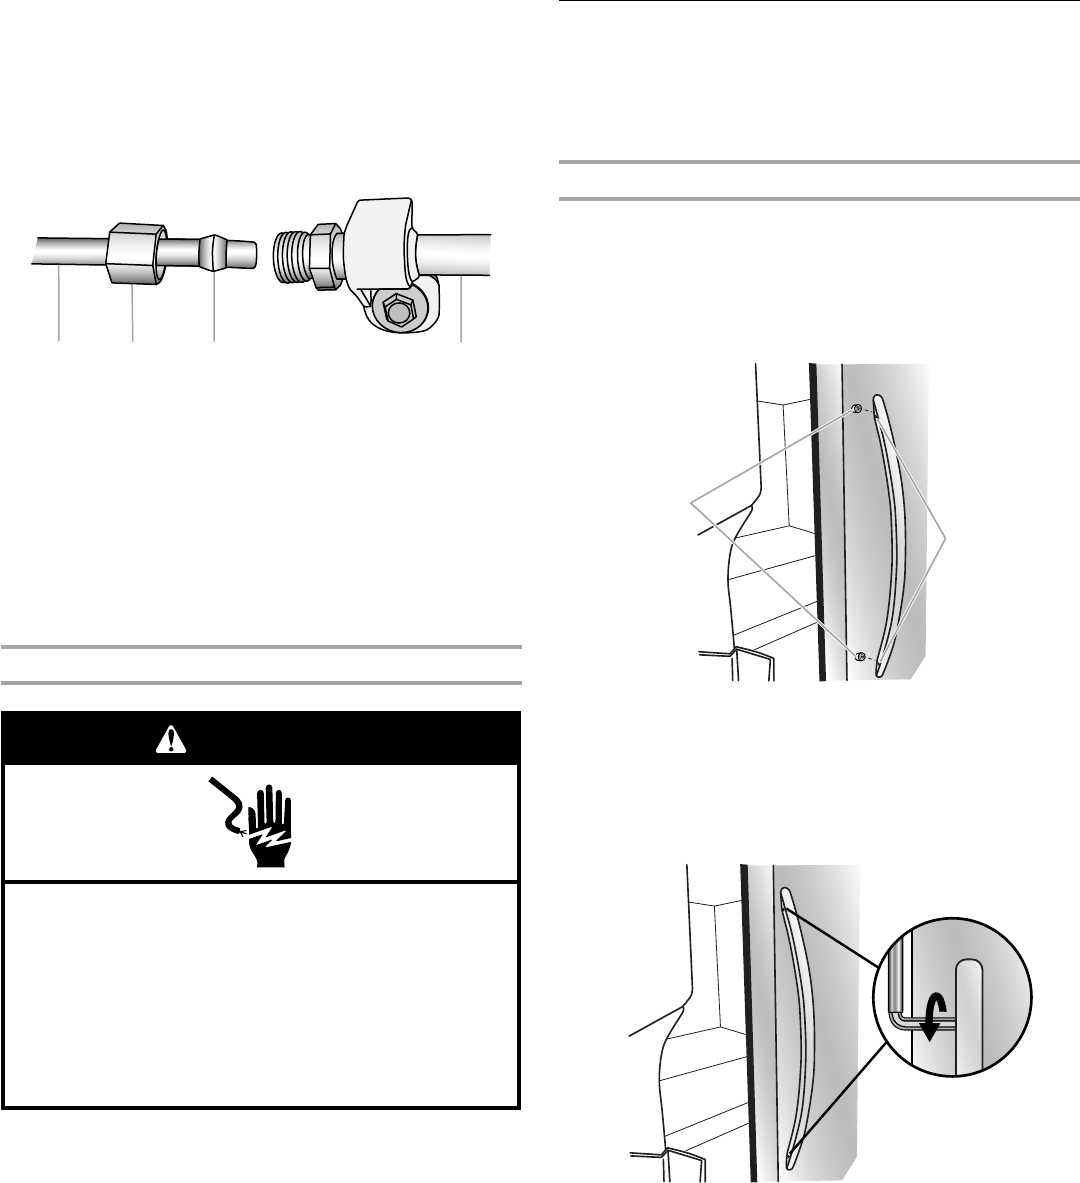
- Style 2 10
- ¹⁄₄" 11
- FILTERS AND 12
- ACCESSORIES 12
- (on some models) 13
- Install CoolVox™ 15
- Kitchen Sound System 15
- Accessories 15
- REFRIGERATOR USE 16
- Adjust Temperature Set Points 17
- Fast Ice 17
- Filter Status 17
- Water and Ice Dispensers 18
- To Dispense Water (Standard): 19
- To Dispense Ice: 20
- FEATURES 22
- DOOR FEATURES 23
- FREEZER FEATURES 24
- REFRIGERATOR CARE 24
- Vacation and Moving Care 25
- TROUBLESHOOTING 26
- Temperature and Moisture 28
- Ice and Water 29
- Explosion Hazard 31
- Use nonflammable cleaner 31
- WATER FILTER CERTIFICATIONS 32
- PERFORMANCE DATA SHEET 33
- MAJOR APPLIANCE 34
- LIMITED WARRANTY 34
- INSTRUCCIONES PARA 35
- EL USUARIO DEL REFRIGERADOR 35
- ADVERTENCIA 36
- INSTRUCCIONES DE INSTALACIÓN 37
- A. Tornillos de tope 45
- A. Tornillo de tope 45
- FILTROS Y ACCESORIOS 47
- (en algunos modelos) 48
- Fast Ice (Hielo rápido) 52
- Estado del filtro 52
- Despachadores de agua y hielo 53
- A. 1 taza de agua 54
- Agua Picado En cubos 54
- CARACTERÍSTICAS DEL 57
- REFRIGERADOR 57
- Cajones para verduras/Cajón 58
- CARACTERÍSTICAS 59
- DE LA PUERTA 59
- CONGELADOR 59
- CUIDADO DE SU REFRIGERADOR 60
- SOLUCIÓN DE PROBLEMAS 62
- Temperatura y humedad 64
- Hielo y agua 65
- HOJA DE DATOS DEL RENDIMIENTO 69
- GARANTÍA LIMITADA DE LOS 70
- ELECTRODOMÉSTICOS 70
- PRINCIPALES DE 70
- DU RÉFRIGÉRATEUR 71
- INSTRUCTIONS D’INSTALLATION 73
- A. Vis à épaulement 81
- FILTRES ET ACCESSOIRES 83
- (sur certains modèles) 84
- Utilisation des commandes 87
- Fast Ice (glaçons rapides) 88
- Statut du filtre 88
- Mode vacances 89
- Mode Showroom (exposition) 89
- A. 1 tasse d’eau 90
- Eau Concassée En glaçons 90
- CARACTÉRISTIQUES DU 93
- RÉFRIGÉRATEUR 93
- CARACTÉRISTIQUES DE 95
- LA PORTE 95
- CONGÉLATEUR 95
- ENTRETIEN DU RÉFRIGÉRATEUR 96
- DÉPANNAGE 98
- (Éclairage sous les 99
- Température et humidité 100
- Glaçons et eau 102
- AVERTISSEMENT 105
- Système de filtration d’eau 106
- MÉNAGERS 107
- WHIRLPOOL 107
- GARANTIE LIMITÉE DES 107
- GROS APPAREILS 107
- W10681477A 108
- EN/FR PN W10669167A 108
Related products and manuals for Fridges Whirlpool WRF997SDDM

 (12 pages)


 (296 pages)
 (72 pages)

 (194 pages)
(194 pages)
(194 pages)
© 2020, manymanuals.com. All rights reserved. | 0.577 s |
 Manymanuals.com
 Manymanuals.de
 Manymanuals.fr
 Manymanuals.it
 Manymanuals.pl
 Manymanuals.cz
 Manymanuals.es
 Manymanuals-pt.com
Comments to this Manuals